Showing posts with label crochet. Show all posts

Sunday, September 1, 2013

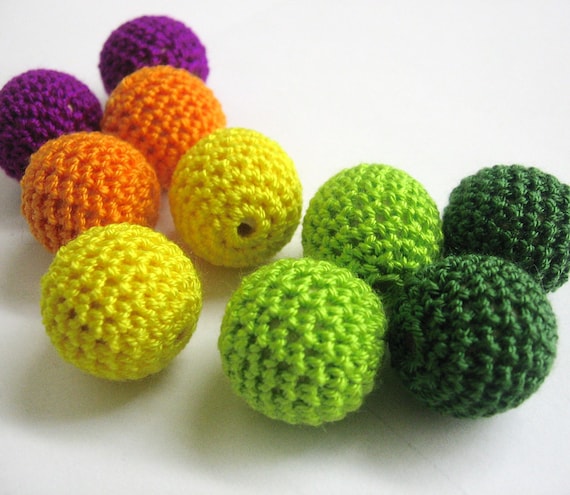
Handmade Crocheted Beads - great supply for jewelry projects

One of most popular product in my Etsy shop is crocheted beads. So I decided to tell a bit about these beads in my blog. :)


What are they made of? 
These beads are natural and are made by covering wood beads with crochet thread. Wood beads I use for them are unfinished - they don't have any varnish, they are no dyed or otherwise modified - it's just pure wood shape with drilled hole. Of course, I don;t make them myself, although I have idea of getting small turner's bench and making them myself. But it's just dream for now.
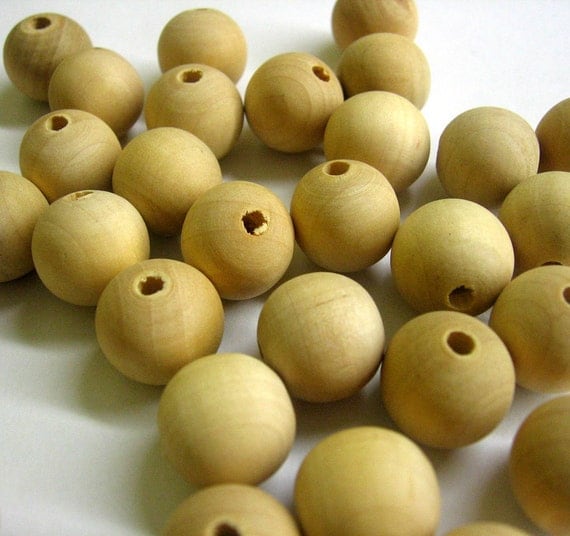
Wood beads I use for making crocheted beads -
You can find them in my shop also :)

But  let's return to the beads. I cover these beads with crochet thread - I use 100% cotton thread,  also natural material. I started with few colour choices, and now I can offer more than 60 different colours. But those beads can be made also with different type yarns - linen or wool, if You want something natural, or acrylic, if You have allergies to natural yarns.
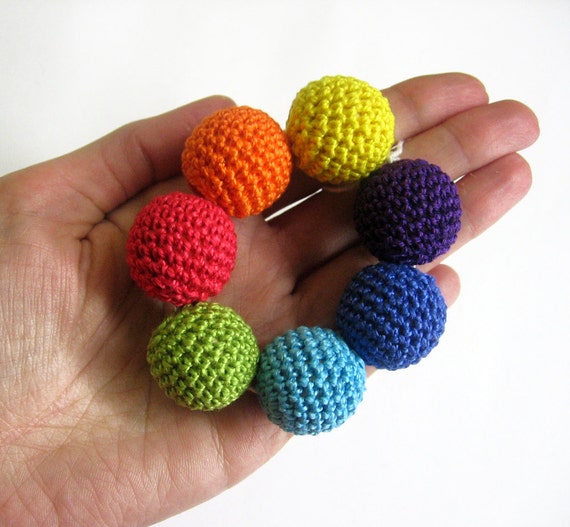
These are 22 mm crocheted beads (cotton thread)

And these are 22 mm beads made with acrylic yarn.

How large are they?
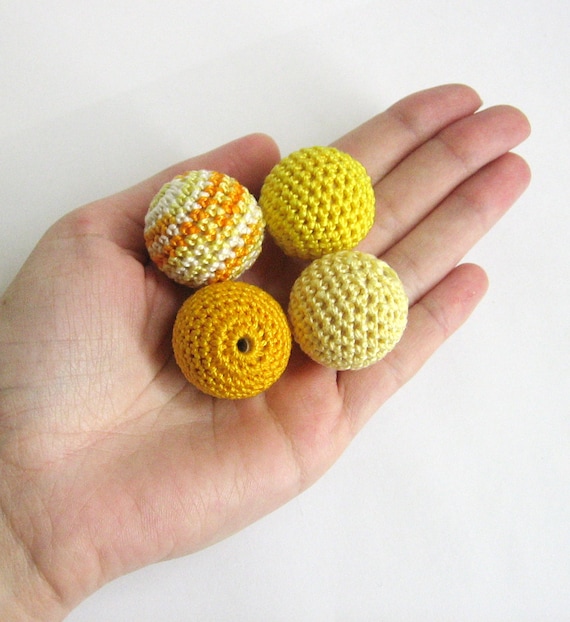
I have different size beads - starting from tiny ones (~11-12 mm) up to 32 mm large ones.
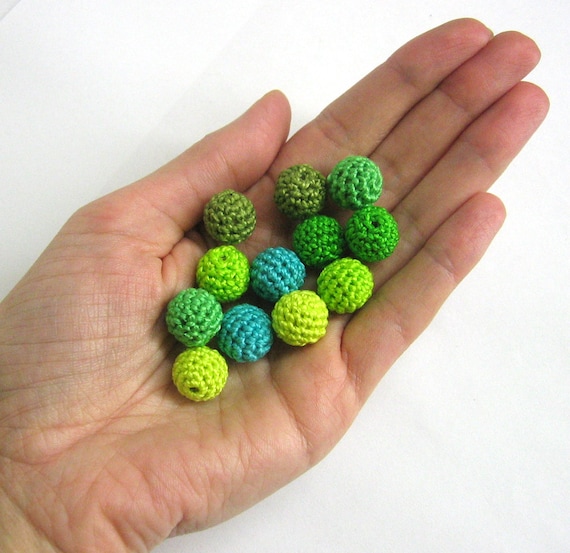
Tiny crocheted beads - 12 mm
And large ones - 27 mm


Where can they be used? 
Crocheted beads are wonderful source for different jewelry projects.
Most popular is teething or nursing necklaces - if You are Mom, You definitely know, how hard it is to wear any jewelry, when You are with baby - they love to touch everything, chew everything, play with everything. So nursing necklaces are great accessories for Moms - they looks wonderful and are safe for babies to chew, to play with - also they are easy to clean. And they are made of.... You are absolutely right - they are made of crocheted beads and plain wood beads.
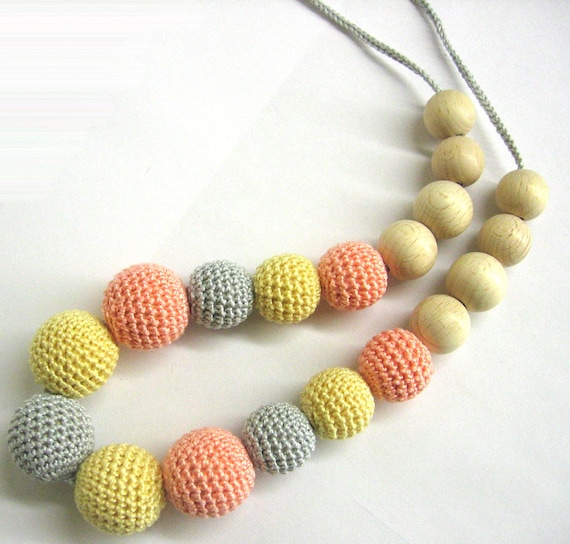
Crocheted nursing necklace.
Larger beads are 27 mm, smaller 20 mm. Size of uncovered beads are 20 mm and 18 mm.
Length of the cord is ~ 1 yard (90 cm). It is also crocheted cotton cord.

But, of course, these crocheted beads can be used also in other jewelry pieces - simple earrings will add special touch to Your look, bracelet will look very cool, too. Or necklace... By the way, hre is my favorite - I made it for sale, look at it... and made one more - for myself :)
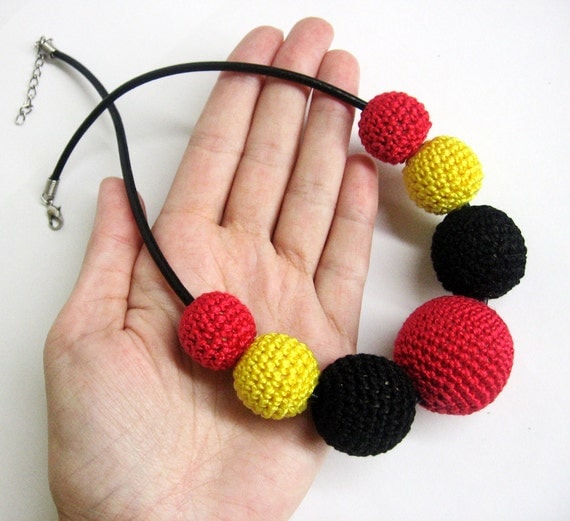
My favorite necklace :)


Where can You get them? 
Well, You can make them Yourself - there are plenty of videos on Youtube with tutorials, how to make them (o.k., I just checked - there are not plenty of them, but still You can find something useful there :) ). Also there can written tutorials and photo tutorials - just google...

Or You can send me a note and I can make them for You! (yes, I know this was shameless self promotion :) ).

So, if You've decided, that You want some cute crocheted beads, You can do one of the following:
A) visit my shop www.kikamoracrafts.etsy.com - look at everything I have and make order! Special offer to those, who have found this post and read it :) Here is coupon code for You - BEADS7 ! All September You can get 7% discount on Your purchases (and it does include everything I have in shop), if it's larger than 15$. 

B) send me a note to sales @ kikamoracrafts. com  (when sending me e-mail, take out all empty spaces in address) with Your wishes.

Here are colours You can choose:

 As for price - it depends on bead size and amount - more You buy, less You pay per bead :)


Tuesday, March 26, 2013

New outfits for Monster High dolls

This month I tried to pay attention to my Monster High dolls. There were two reasons for this. First - I have more of Monster High than I should (but less than I would like to have). They have different skntones, different hair color and hairstyle... So every outfit I make is like something totally new and exciting.

Second - as You know, I have Etsy shop. This month I joined a team called "TEAM + 10". It's a "challenge for sellers that want to grow their business. Add +10 listings to your shop each month, or set your own goal!" One of my goals was to add at least 10 doll outfits. So I thought this time I could be Monster High doll outfits.

So, this post is kind of gallery of my March goal in "TEAM + 10". As month is not over yet, I have only six outfits this far, but I will  make more :) After all, my Claudine werewolf and roller skater Frankie also wants to be models :)

So, here I present You my newest Monster High doll dress collection - all dresses are crocheted. Each dress has some matching accessorie - either headband, or belt, or bracelets... Also all of them are kind of "OOAK" (one-of-a-kind") - I don't use any patterns so I'm pretty sure I won't be able to make another same looking outfit - somethind very similar - yes, but not same.

So - take a look and enjoy!
P.S. (Tiny self promotion) If You want something, You can buy it here:
KikamoraCrafts on Etsy >>

 Monster High doll outfits crocheted by KikamoraCrafts!
 
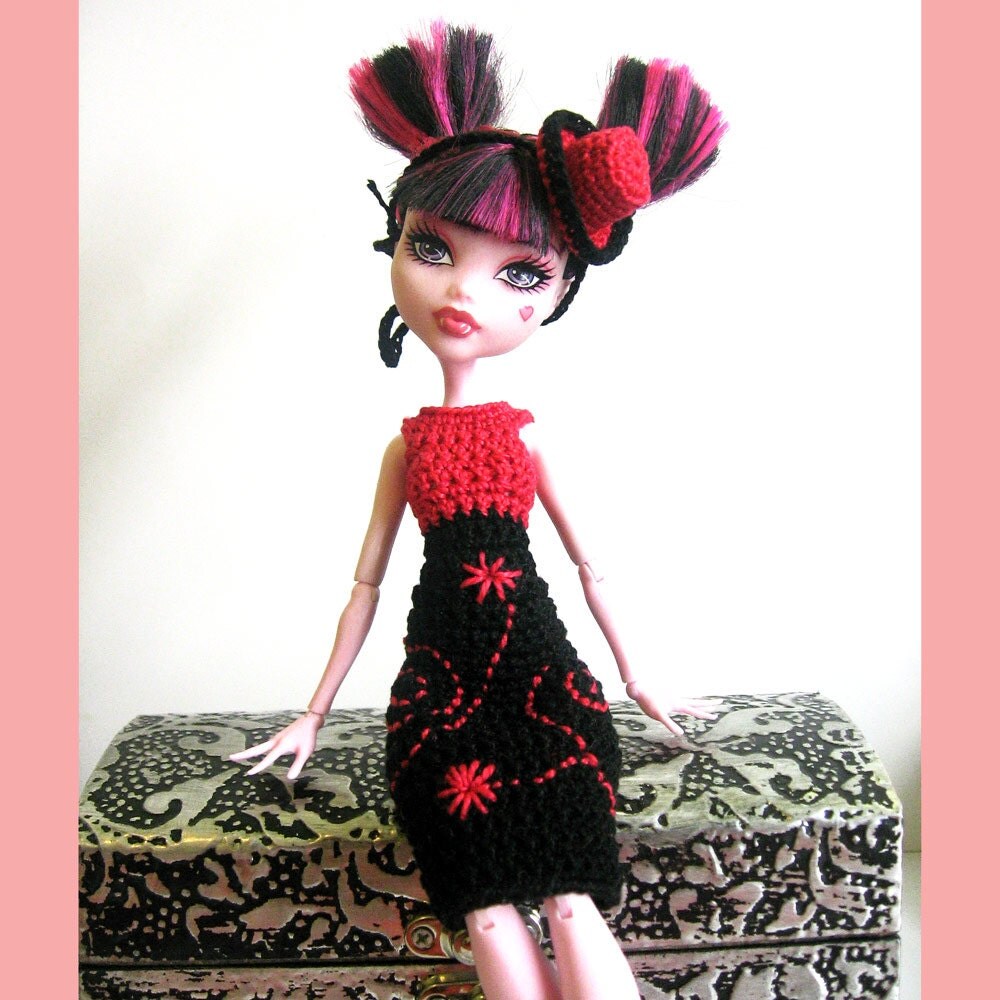
Crocheted dress in red and black for Monster High dolls.
"Live model" - Draculaura.

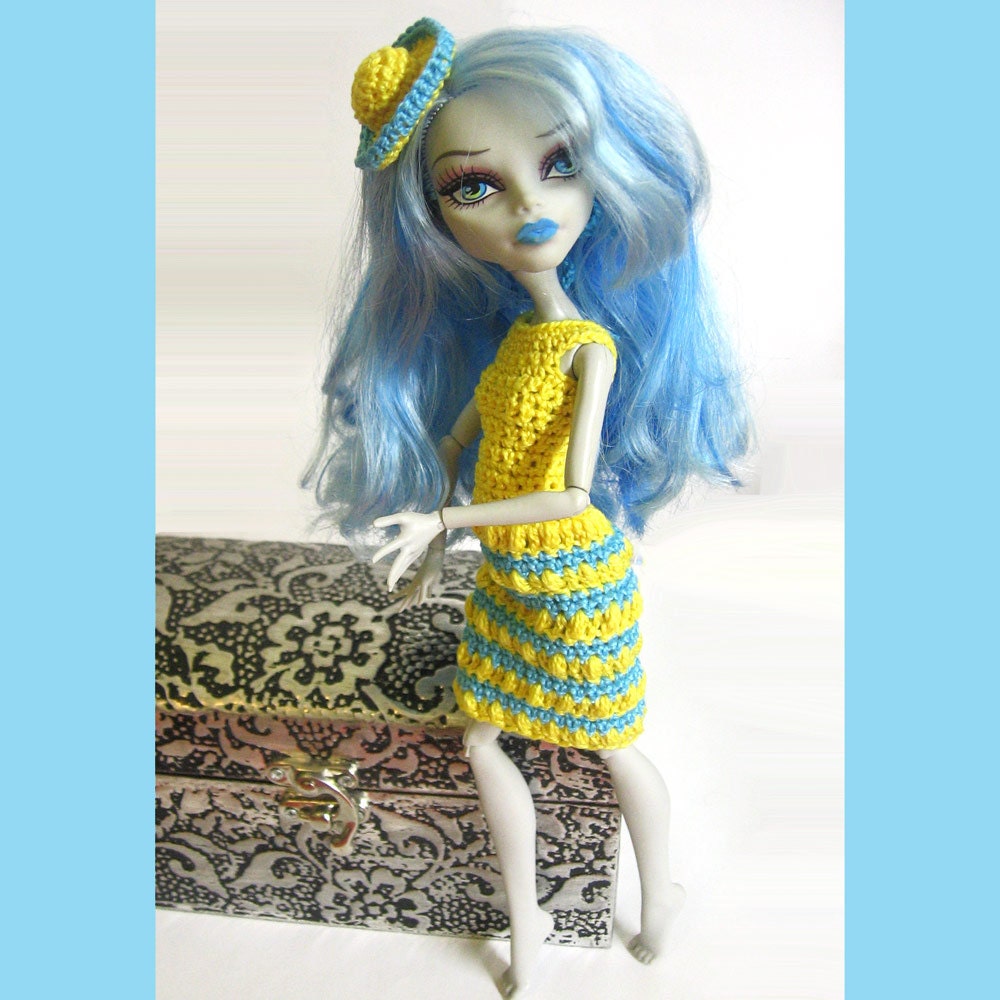
Crocheted dress for Monster High doll on my "live model" Ghoulia.
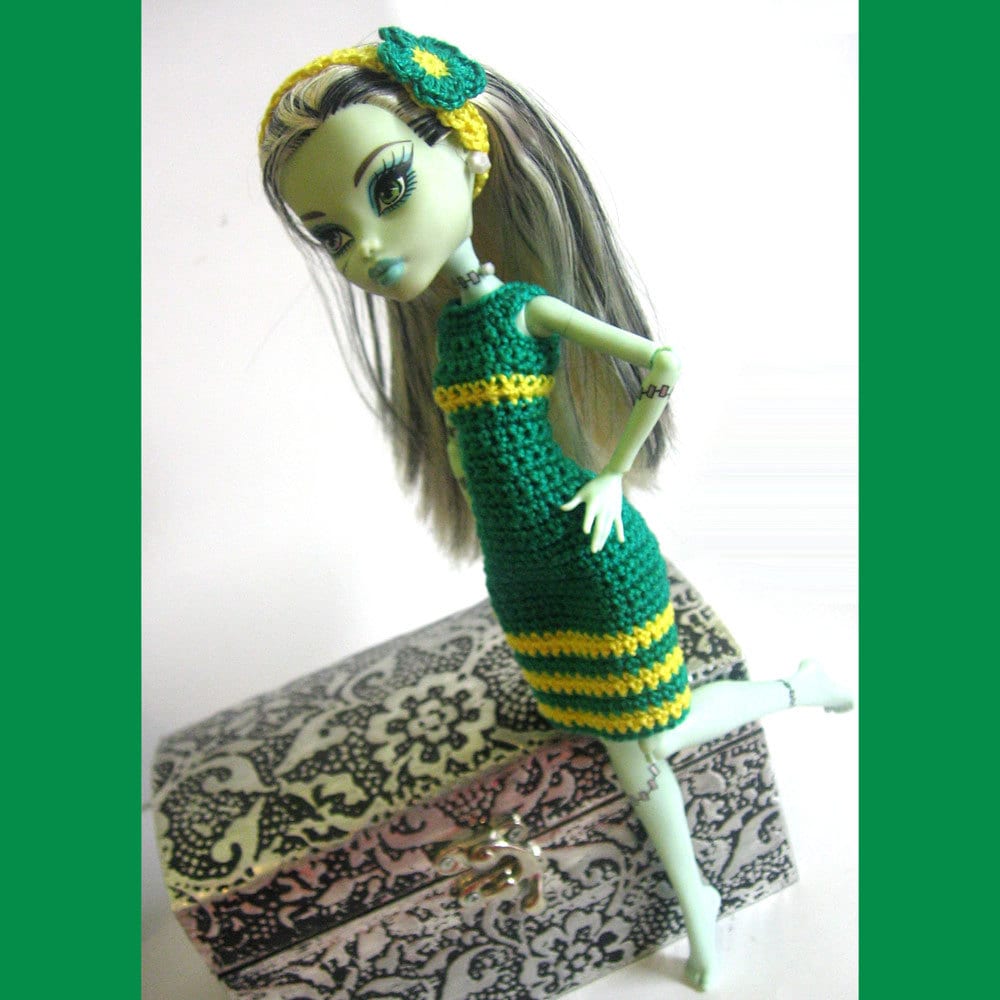
Jade green dress for Monster High dolls. As You can see,
Frankie looks great in it!
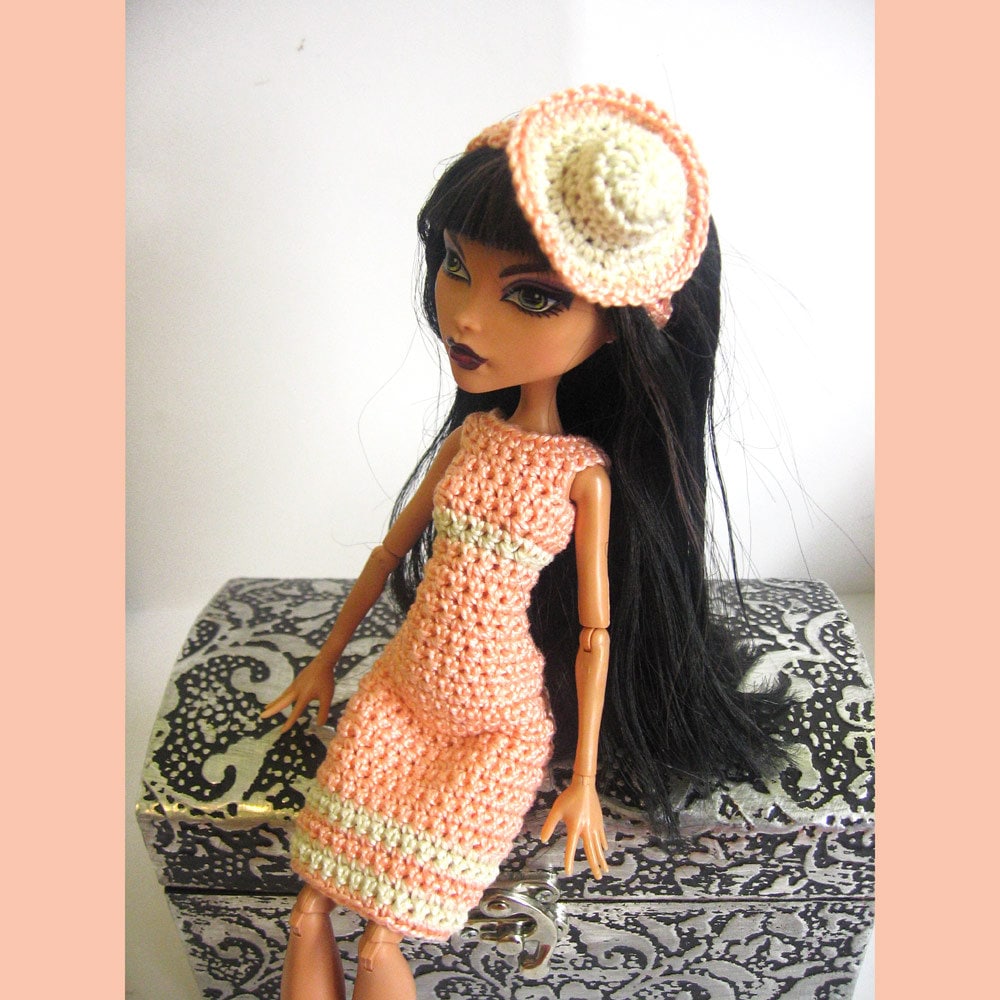
Peach pink dress for Monster High dolls. Cleo looks sweet
in this outfit, doesn't she?
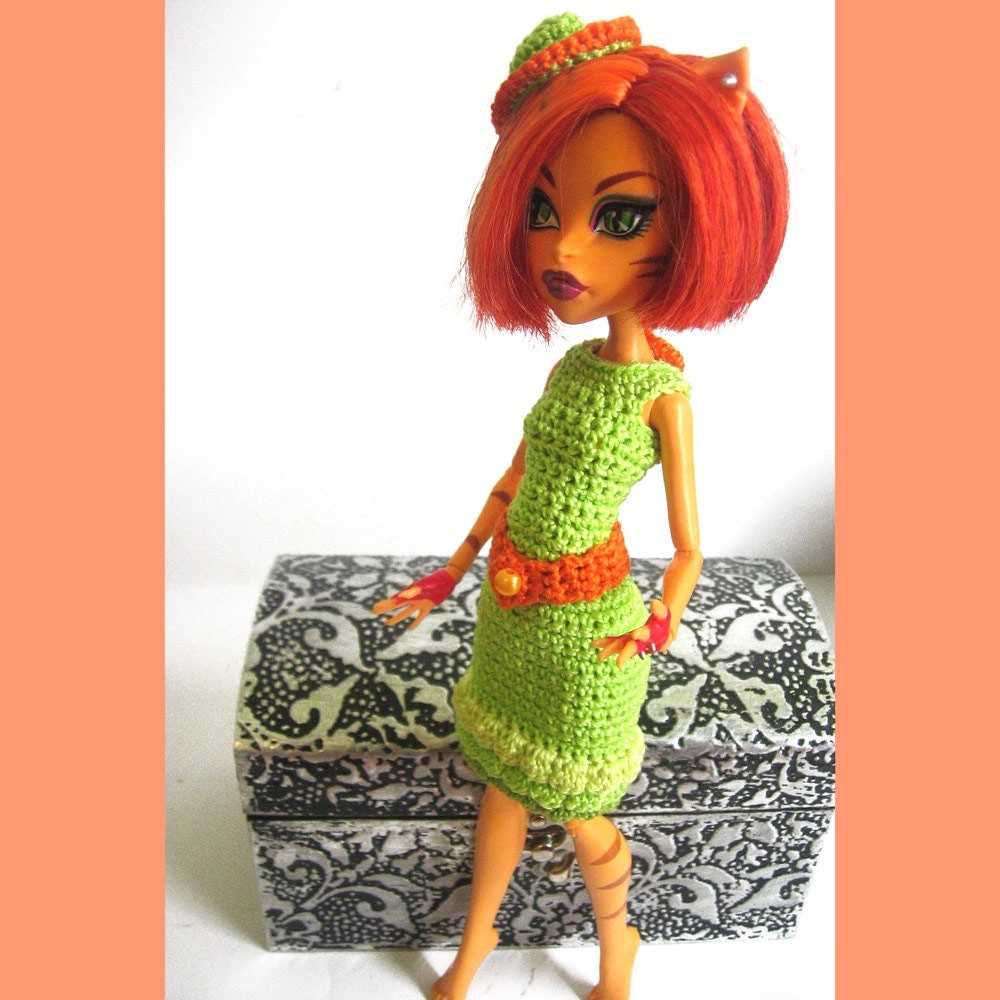
Light green dress with ruffle and orange belt for Monster High dolls.
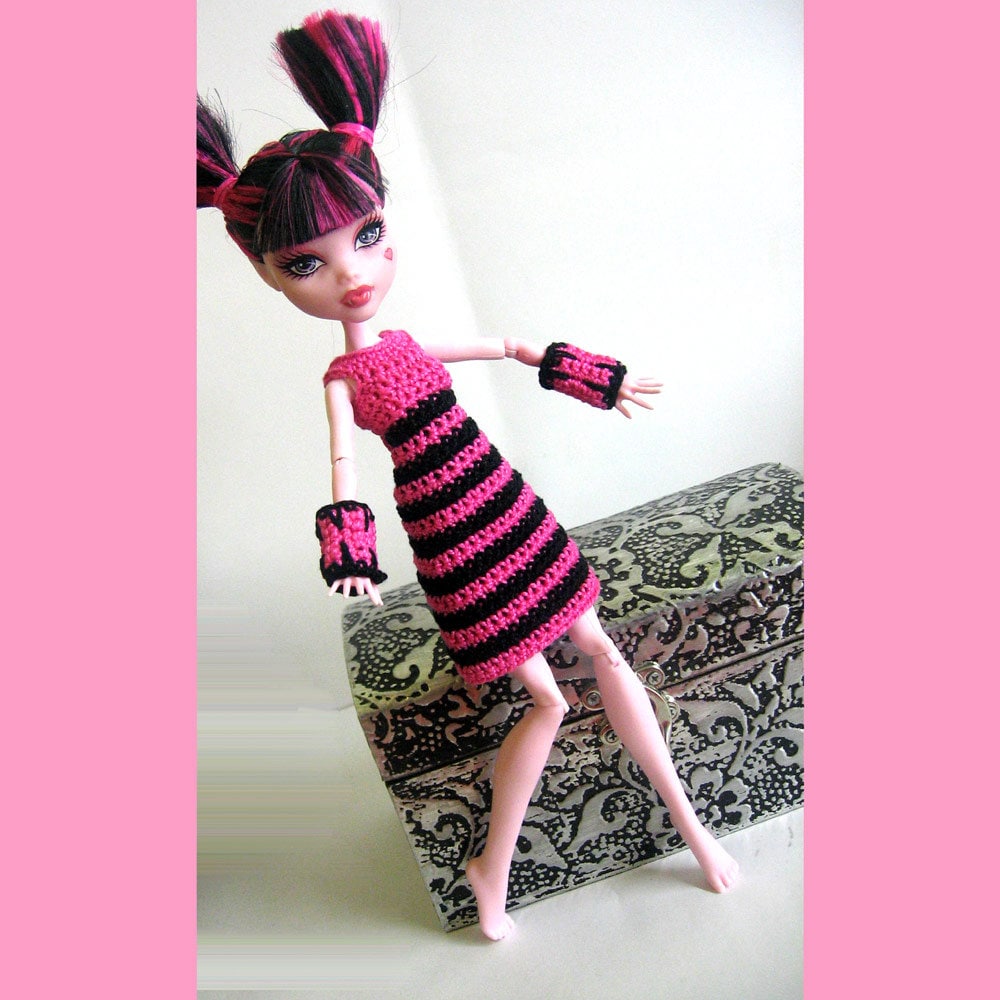
Dress with pink and black stripes + cuff bracelets - adorable!
Monster High Draculaura looks cute in this outfit!

Thursday, February 28, 2013

Simple crocheted shamrock applique - photo tutorial

Few days ago I was asked if I can make small crocheted shamrock appliques. So I tried and made some. It was fun so I decided to share this fun with other people :) So - here is simple tutorial of cute shamrock applique.
I'm not so good at writing tutorials and crocheting terms so I added pictures for each step.


Stitches used for this applique:
Chain (ch), slip stitch (sl), double crochet (dc), treble stitch (tr).


So - let's start!

1. Make magic loop (or magic circle).


Make magic loop (magic circle)


2. Chain 3, treble stitch 1, chain 1, double crochet 1, chain 1, treble stitch 1, chain 3, slip stitch in magic loop.


Chain 3
Treble stitch 1, chain 1, double crochet 1, chain 1,
 treble stitch 1, chain 3, slip stitch in magic loop.
This is how it will look now.

3. Repeat previos step  two more times (or three if You want lucky clover leaf).

Now this starts to look like shamrock.


4. Now we need make stem for this shamrock.

Chain 7, turn. Slip stitch in 2nd stitch from hook, slip stitch in each stitch till end of the row, last slip stitch make into magic loop.

Chain 7, turn.
Slip stitch in 2nd stitch from hook, slip stitch in each stitch
till end of the row, last slip stitch make into magic loop.


Now turn around, pull the thread. Weave in ends.


Congratulations! You have cute shamrock applique! Try different yarns and threads - these appliques look a bit different with different yarns.

Cotton yarn, applique measures ~1,2 inches

Embroidery thread, measures ~1 inch wide

Cotton thread nr.10, measures ~1 inch wide.

And, if You don't want to crochet, but want these cute appliques (and many more different appliques), You are welcome to visit my shop at www.kikamoracrafts.com


Thursday, July 14, 2011

How to crochet bikini top for Barbie doll - tutorial for beginners

This simple how-to tutorial will show You how to crochet great looking bikini top
for Barbie doll. My model is contemporary Barbie (made in 2009) so
this top will fit this type of dolls. If You have different doll model
measurements might differ.

Pattern is very simple and consists only of 4 rows. You will
use these stitches:
ch - chain
sc - single crochet
dc - double crochet
tr - triple (treble) crochet
sl - slip stitch
All these are basic stitches and if You are not sure how to do
them, You can click on them to find out great instructions for
beginners.
 
I cannot say I'm good in writing patterns therefore I took pictures of each step not only to tell, but also show how to crochet this bikini top.
If You don't understand anything or have noticed mistake or have any questions - feel free to add comment  or contact me.

easy crochet bikini for barbie pattern 1
For bikini top You will need:
Thin crochet thread (nr.20 cotton thread)
1,25 mm crochet hook
1 snap for closure


So, lets start!
image
Chain 51


imageRow 1
Make all row in single crochet


image
Row 2
17 single crochet, skip 2, 9 treble crochet in same ch, skip 2, 3
sc, skip 2, 9 treble crochet in same ch, skip 2, 20 sc.


imageRow 3
19 single crochet, skip 1, 9 dc, skip 1, 1sc, skip 1, 9 dc, skip 1,
16 sc.


imageRow 4
15 sc, skip 1, 8 dc, 1 sc, 1 sl, 1 sc, 8 dc, skip 1, 18 sc.
Fasten off and weave in ends.


Now You have made bikini top. Only thing that has left - add straps
(if You don't want it strapless) and sew on snap.

image
Left strap for bikini top:
Ch into 5th chain to the right from the middle of bikini, sc in
same ch. Ch 23. Ch into 5th ch from left side, sc in same ch.
Right strap:
Ch into 5th chain to the left from the middle of bikini. Sc in the
same ch. Ch 23. Ch into 6th from right side, sc in same ch.


Variation 1:
You can also make one strap bikini top. In this case:
Ch into 5th chain to the left from the middle of bikini. Sc in the
same ch. Ch 27. Ch into 5th chain to the right from the middle of bikini. Sc in the
same ch.

Variation 2:
Try also using two colors to make this bikini top even more attractive. For example - crochet first three rows with one color, but last row and straps - with other. Like this:
image


Variation 3
If You don't want to crochet, You can just buy some of bikini's at Loststitch studio or order them in colors You want! (sorry, could not resist to this self promotion ;) )

Thursday, July 7, 2011

Blythe fashion - crochet simplicity

For few last days I was totally out of inspiration - not only I couldn't make anything new, but I couldn't crochet at all - stitches were absolutely uneven. Last night things at last got better and I made some cute blouses for Blythe. As I didn't have buttons that would be small enough I used beads instead (I also ordered some tiny doll buttons from ebay - i will get them after 3 weeks).
So here are Blythe posing in all three blouses.

White blouse with big black buttons

Black crocheted blouse with golden buttons for Blythe

White crocheted blouse with pink buttons


Monday, February 21, 2011

Handmade Barbie clothes - something for Your doll!

From Wikipedia, the free encyclopedia
Barbie

Barbie is a fashion doll manufactured by the American toy-company Mattel, Inc. and launched in March 1959. American businesswoman Ruth Handler is credited with the creation of the doll using a German doll called Bild Lilli as her inspiration.
Barbie is the figurehead of a brand of Mattel dolls and accessories, including other family members and collectible dolls.

When I was a kid I did not like to play with dolls - may be because there were only "baby born" type dolls available and I hated those. When I got my first (and only one) Barbie doll I was in heaven. Fact that she was not original Mattel and used to lose all her extremities (including head) did not bother me much. What I loved about her - I could dress her up like real girl, real woman.

Now I've grown up, but still like to make clothes for Barbie dolls. Here are some of my latest creations for Barbie doll.
You can also buy them - visit my Artfire studio or Etsy shop!


Pink outfit for Barbie doll
 Pink outfit - pink jacket, skirt and white hat

Elegant and classic everyday outfit to wear to work or school. "Buttons" and fringe of jacket anf skirt add little romantic accent.


Blue summer outfit for Barbie
Blue summer outfit

Strapless dress, large sun hat and purse. Need outfit for meeting friends at summer caffe? This is it!


Barbie wedding dress
 White Barbie doll wedding dress

Oh, yes, wedding dress is THE dress every girl dreams of. Barbie also is a girl and has a dream about wedding outfit.
This is very romantic wedding outfit - white dress (bottom of which is embellished with many flowers), white headband and, of course, bride bouquet.


Barbie outfit with headband and boa
Pink outfit "from 20s"

Inspired from old photos of 20s I made this outfit with touch of fashion from that period. Still this outfit is absolutely modern. If wearing only dress, Barbie will look like modern girl in romantic summer dress. But add headband and boa... and she is ready to attend thematic partie!

Thursday, January 27, 2011

Crochet heart applique - tutorial pattern for beginners

 Valentine day is coming and You could definitely use some of those cute heart appliques, right? Well, You can either buy them or make them. If You decide to make them here is tutorial of very simple heart applique - simple, but still great looking.

By the way - if You want buy them - I have some in my etsy shop! Take a look!


Notes about this tutorial
You will need a little bit of yarn or crochet thread and crochet hook.
For this tutorial I used 2,5 mm crochet hook and 4-ply mercerized cotton yarn. Heart applique made of this yarn measures ~ 4 cm (1,6") in width and ~ 3,5 cm (1,4") in height. But You can also try different yarns and threads.

Used stitches:
ch - chain
sc - single crochet
dc - double crochet
tr - triple crochet
ss - slip stitch

So, lets start!

Step 1 - chain
Step 1

Chain 5
(or even better - use "magic loop" - if You are crocheter, You know, what is it. If not - here is great video tutorial:
https://www.youtube.com/watch?v=YfKKoU4HpCs . If You use magic loop, skip step 2 of this tutorial)


Step 2 - make ring
Step 2

With slip stitch make ring.


Step 3 - round 1
Step 3 - round 1

Note: All stitches of this round You make in the ring.

Chain 1; 1x single crochet, 1 x double crochet, 1 x triple crochet, 4 x double crochet, 1 x triple crochet, 4 x double crochet, 1 x triple crochet, 1 x double crochet, 1 x single crochet.

Well, if You have good imagination this already starts to look like heart. Now we will give  this applique shape of heart.


Step 4 - round 2
Step 4 - round 2

[2x single crochet in the next chain]; repeat [..] 3 more times; 1 x single crochet in next 3 chains; 3x single crochet in next chain, 1 x single crochet in next 3 chains; [2x single crochet in the next chain]; repeat [..] 3 more times; slip stitch in the ring. Fasten off and weave in ends.


Congratulations!
You have made crochet heart!

Large heart - crochet hook 4mm, wool
Medium heart - crochet hook 2,5 mm, cotton yarn
Small heart - crochet hook 1,75 mm, cotton thread nr.10
These are different size and different material hearts made by this pattern.

Tuesday, January 18, 2011

Crochet hat for Barbie doll - tutorial pattern for beginners

For making this hat You will need 2 mm crochet hook and yarn that matches this size hook. I used 4ply mercerized cotton yarn. If You use different size hook or yarn result may differ from original (be bigger or smaller).
Used stitches:
ss - slip stitch
sc - single crochet
dc - double crochet
ch - chain

In rounds 1 - 9 I used back loop crocheting (insert hook under back loop).


O.K. Let's start!

Step 1 

Step 1 - make chain.

Chain 5.


 Step 2
Step 2 - form a ring.
 
Join with slip stitch (ss) to form a ring.


Step 3 - round 1
Step 3 - round 1
10 x single crochet (sc) in the ring; slip stitch (ss) in 2nd chain from the hook.

Step 4 - Round 2
Step 4 - round 2
Chain one; [2 x single crochet in next chain, 1 x single crochet in next chain]; repeat [..] 4 more times; 1 x single crochet in next chain; slip stitch in next chain.  
Step 5 - round 3
Step 5 - round 3
2 x single crochet in next chain; 1 x single crochet in next chain]; repeat [..] 7 more times; slip stitch in next chain.

Step 6 - rounds 4 - 7

Round 4
1 x single crochet in each chain (24 times); ss in next chain from the hook.
Round 5
1 x sc in each chain (24 times); ss in next chain from the hook.
Round 6
1 x sc in each chain (24 times); ss in next chain from the hook.
Round 7
1 x sc in each chain (24 times); ss in next chain from the hook.

As You can see - all 4 rounds are the same.
You now have 2 choices
Leave the hat as is or continue
- turn to the other side.
You can either leave the hat as is (looks already nice, doesn't it?) or continue.
If You decide to continue, turn hat to the other side.

Step 7 - round 8 

Step 7 - round 8
2 x single crochet (sc) in each chain.
Step 8 - round 9

In this round we will start to use double crochet (dc).
[2 double crochet in same chain; 6 x double crochet]; repeat [..] 5 more times; 2 x double crochet in same chain; 4 x double crochet; slip stitch in 2nd chain from hook.

Step 9 - round 10

Round 10 - finished hat.
1 x single crochet in each chain; slip stitch in next chain. Fasten off.
Congratulations! You have this cute Barbie doll hat. Now You can embellish it with some ribbon or flower... or just leave as is because it looks so cute :)
Related Posts Plugin for WordPress, Blogger...